
You're standing in a trench or a handhole, the old splice is wet, the jacket is brittle, and the customer wants the circuit back before the end of the day. That's where underground wire splice kits stop being a catalog item and start being a decision about moisture, location, conductor type, and whether the splice can survive the next season without another dig-up.
The mistake I see most often is treating the kit as the whole solution. A good underground splice still fails if the location is wrong, the conductor match is wrong, or the sealing method is rushed.
Table of Contents
- Why Underground Splices Fail and What a Kit Must Do
- Comparing Underground Splice Kit Types and Sealing Technologies
- How to Select the Right Kit for Your Conductors and Environment
- Installing an Underground Splice Kit for a Watertight Seal
- Where You Can Legally Place Splices and How to Test Them
- Final Checklist for Reliable Underground Splices
Why Underground Splices Fail and What a Kit Must Do
A buried splice usually does not fail because the brand was wrong. It fails because water, dirt, or a poor enclosure got to it, and the repair stayed buried long enough for the connection to deteriorate.
The failure often starts before the splice itself
I have pulled up direct-burial repairs that looked fine on day one and later found failed because the enclosure never sealed properly, the conductors were not cleaned well, or the splice was placed where it should have been treated as inaccessible. Utility field reporting on underground fiber work points to about 28% of installation issues coming from splicing and splice-case problems, with poor cleanliness, rushing, and weak sealing repeatedly named as failure points (UTC underground fiber report).
Practical rule: If a splice is going to live in wet soil, the kit must do more than connect conductors. It has to keep water out, hold insulation integrity, and stay sealed after the trench is closed.
That standard has been built over time. A 1976 technical note traced premolded and slip-on cable splices for solid-dielectric insulated cables back to the 1950s, with standard publications cited in 1969 and 1971 for rubber-insulated and cross-linked polyethylene-insulated systems, which shows that modern underground splice-kit design grew out of decades of utility cable development (CSA cable standards reference). The point is simple. Underground wire splice kits still have to survive moisture, burial, and long service without opening up.
Location compliance matters as much as sealing
Retail listings like to say watertight or submersible. Utility specs are stricter. Utility and government specifications commonly restrict splices to accessible locations such as manholes, handholes, or pedestals, because a buried splice that cannot be reached becomes a maintenance problem and often a compliance problem too.
That gap catches a lot of buyers off guard.
A kit also has to match the conductor type, because copper and aluminum do not tolerate the same hardware or prep. Shielded cables add another layer, since the shield path has to stay intact through the splice instead of being treated as an afterthought. If the kit is meant for the wrong conductor, or the shielding path is handled poorly, the splice may still be buried, but it will not be dependable.
For procurement, I look at three questions first. Can the splice stay dry in the soil conditions? Can it be placed where the spec allows? Can it match the conductor and cable construction on the job? If any answer is weak, the kit is only part of the fix.
Comparing Underground Splice Kit Types and Sealing Technologies
The category looks simple on a product page, but the sealing method changes how the splice behaves in the ground. Heat-shrink, resin-filled encapsulated kits, and silicone or gel-sealed kits all solve the same problem differently, and they don't fail in the same way.
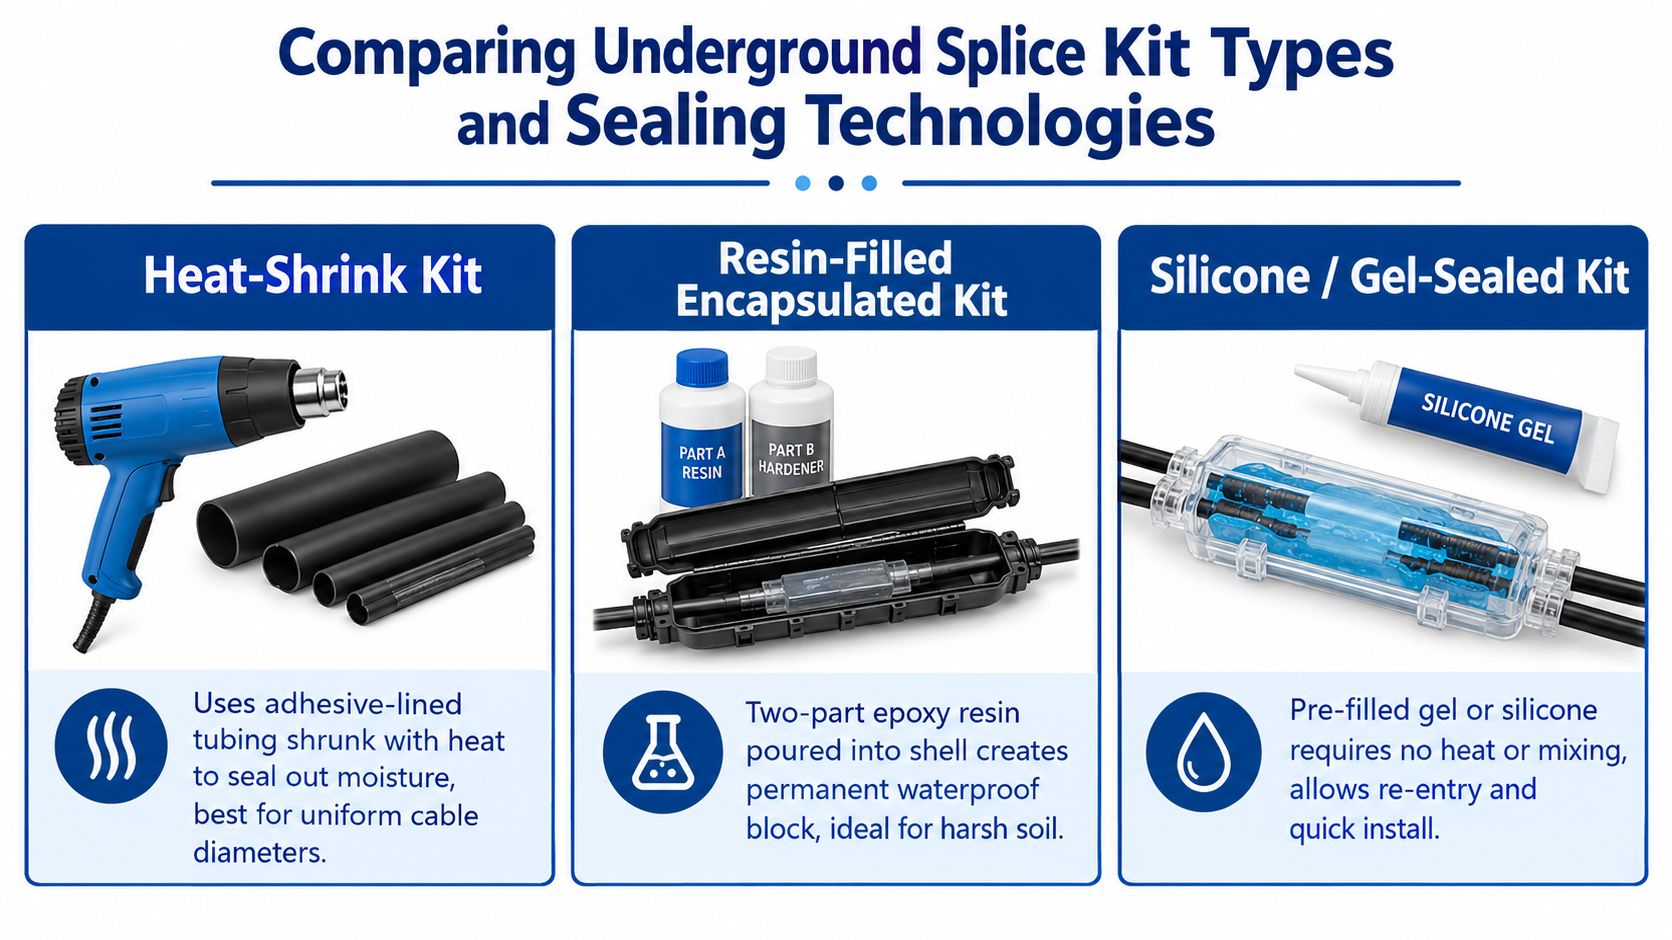
Three sealing methods, three very different jobsite realities
| Kit Type | Sealing Method | Best Use Case | Trade-off |
|---|---|---|---|
| Heat-Shrink | Adhesive-lined tubing shrinks with heat and bonds around the splice | Uniform cable diameters, controlled installs, work that needs a compact finished profile | Needs heat, clean prep, and enough room to work without scorching or underheating |
| Resin-Filled Encapsulated | Two-part resin or epoxy is poured into a shell and cures around the splice | Harsh soil, wet locations, and places where long-term sealing matters more than speed | More permanent, slower to install, and messy if the enclosure isn't positioned correctly |
| Silicone or Gel-Sealed | Pre-filled gel or silicone blocks moisture without heat or mixing | Quick repairs, re-entry needs, and jobs where speed matters | Usually easier to install, but the sealing system still depends on correct conductor fit and enclosure closure |
What each type is good at, and where it disappoints
Heat-shrink kits are popular because they're tidy and familiar. They work well when the cable diameter is predictable and the installer can heat the tubing evenly, but they're less forgiving if the work area is cramped or the cable jacket is contaminated.
Resin-filled kits are the old reliable choice for ugly environments. Once they're cured, they give a permanent waterproof block, which is why they make sense in harsh soil or wet conditions. The trade-off is simple, they're less forgiving during install, and once poured and set, you're not opening them casually.
Silicone or gel-sealed kits win when time matters and you might need to re-enter later. They're fast, they avoid torching or heating in awkward places, and they reduce the chance of installer error caused by a rushed resin mix. The catch is that “fast” doesn't mean “unimportant”, the conductor still has to fit, the enclosure still has to close correctly, and the application still has to allow that style of splice.
The right kit is the one that matches the environment you actually have, not the one with the best retail headline.
For procurement teams, the category is still active and broadening across heat-shrink, resin-filled, and silicone-seal formats, but the key decision is whether the kit's sealing method fits the burial condition and the maintenance expectation. If a splice may need to be opened later, don't buy a system that behaves like a permanent potting block unless the spec calls for exactly that.
How to Select the Right Kit for Your Conductors and Environment
Most ordering mistakes happen before anyone opens the box. The wire fits, the connector looks right, and then the kit is wrong for the conductor material, cable construction, or environment.
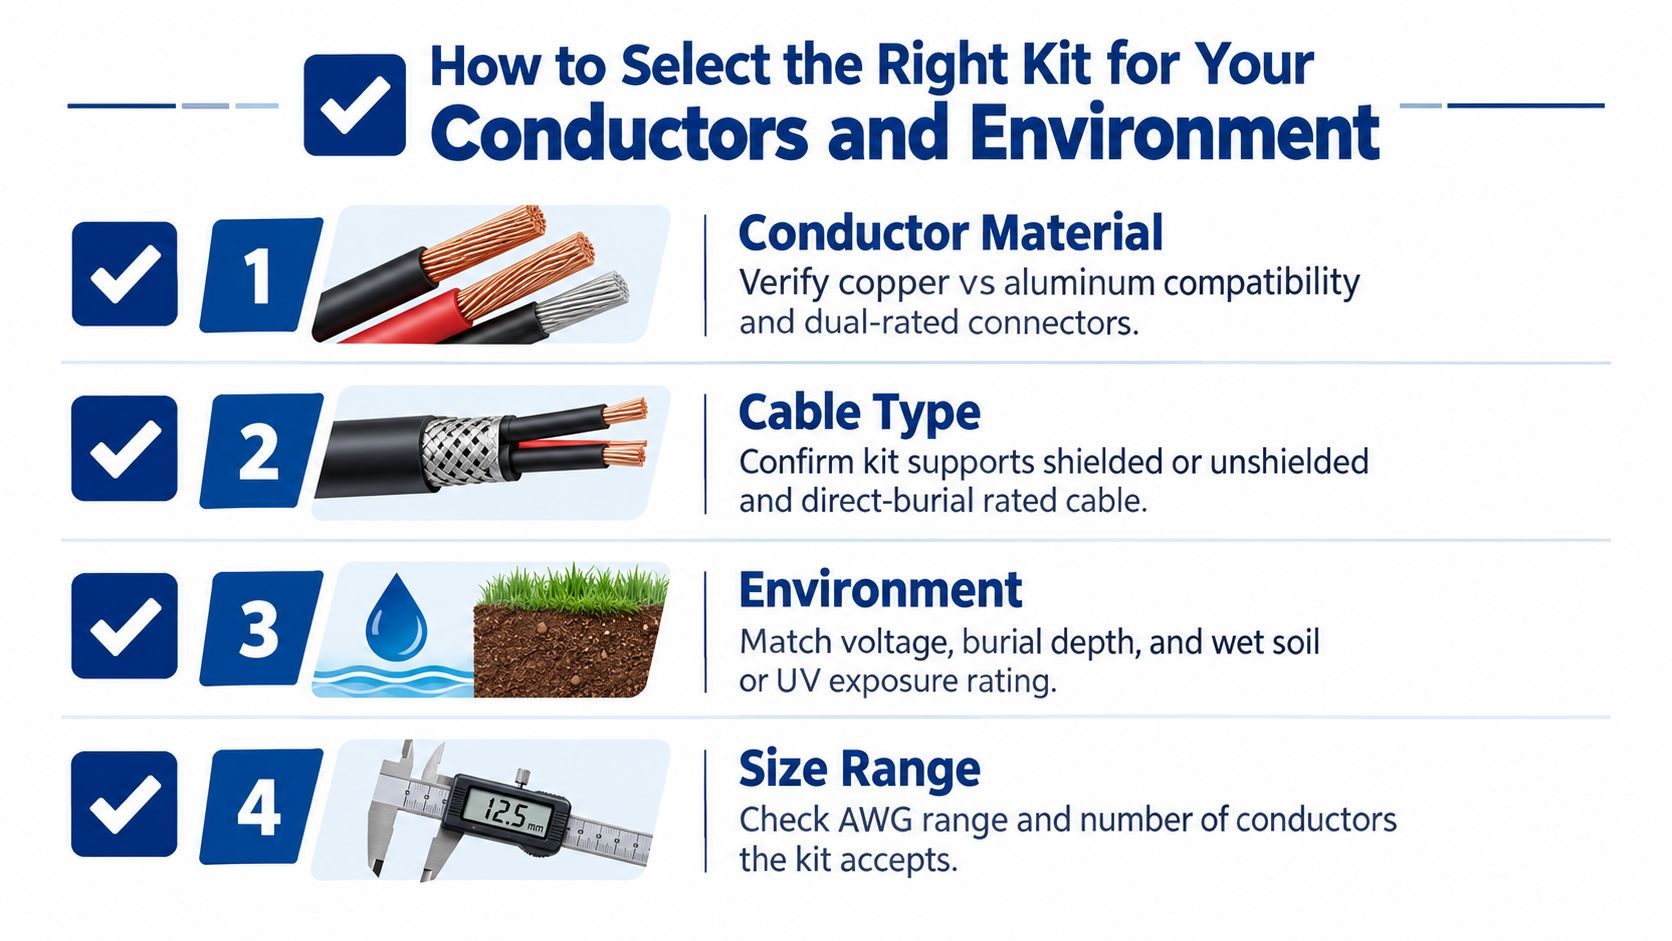
Start with conductor material, not packaging language
Copper and aluminum are not interchangeable in practice. A kit that works on copper branch circuits may not be acceptable on a larger feeder, and a conductor-specific SKU can be the difference between a clean install and a return trip.
The ideal order check is straightforward:
- Verify the conductor metal. Make sure the kit is listed for copper, aluminum, or both, because material mismatch changes connector behavior.
- Confirm the cable style. Shielded and unshielded cables don't always use the same accessories, and direct-burial rating isn't automatic.
- Match the size range. A kit built for small UF branch circuits is not the same product as a larger feeder kit.
- Check the environment. Wet soil, direct burial, and exposure conditions should be part of the selection, not an afterthought.
A quick example makes the point. A UF kit rated for #14 to 8 AWG copper is not a substitute for a 1/0 to 250 MCM Al/Cu kit. Those are different jobs, different connector geometries, and different failure risks. The current product category shows the category split across narrow SKUs, with some kits aimed at small copper conductors and others built for larger aluminum or copper ranges (IDEAL product listings).
Compare the application to the listing, not just the wire size
The right kit has to fit more than the conductor barrel. It also has to fit the way the cable will live in the ground. Soil movement, moisture, and burial depth affect whether a splice should be treated as a simple connection or as part of a sealed system that has to hold up over time.
If you're working on an outdoor branch circuit or a feeder, check the listing for direct-burial suitability, wet-location use, and the number of conductors the kit accepts. If shielded cable is involved, don't assume a generic kit will handle it cleanly.
For buyers who need a broader electrical sourcing path, ATEK Distribution is one place to compare connectors, wire termination parts, and related supplies without starting from a random retail listing.
Field note: If the product page doesn't clearly state conductor material, size range, and burial suitability, treat that as a warning, not a gap to guess through.
Installing an Underground Splice Kit for a Watertight Seal
A splice can look fine on the bench and still fail in the trench if the work is rushed. Wet jacket surfaces, dirt in the connector area, or a poor heat cycle will defeat a good kit fast.
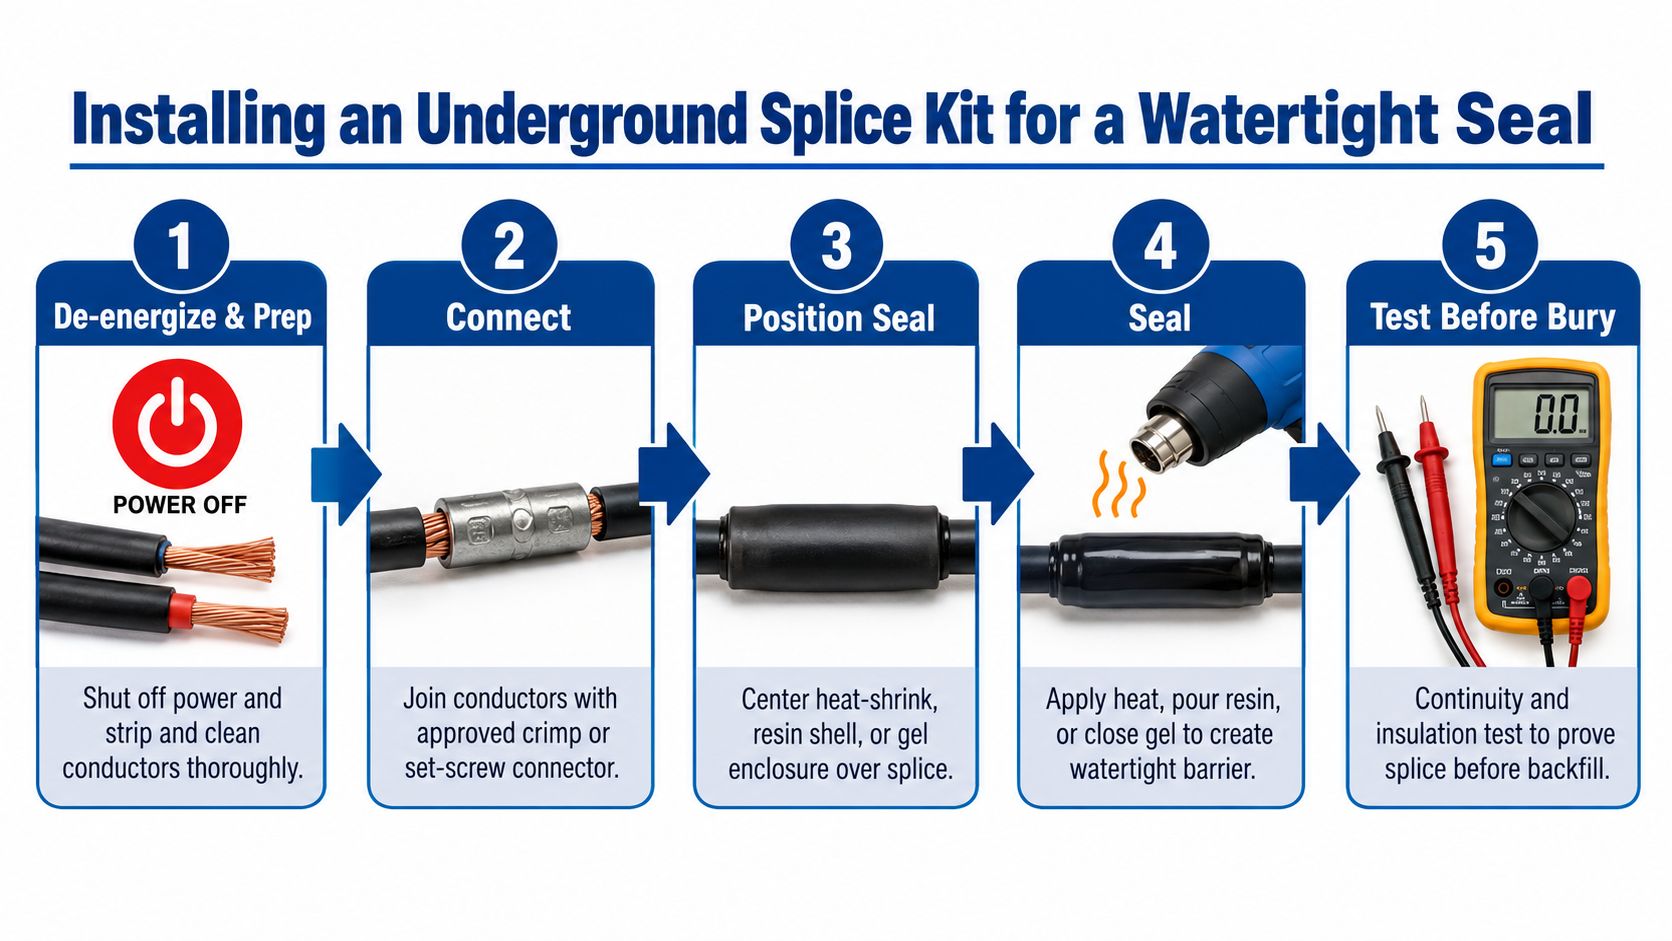
Clean prep is where most of the job is won
De-energize the circuit first, then strip, clean, and dry the conductors before you make the mechanical connection. As noted earlier, poor cleanliness and rushed work are major contributors to splice problems, which is why the connection has to be built on a clean, dry surface before any sealing step starts.
Use the connector the kit specifies, and torque it the way the manufacturer intends. A loose crimp or an under-set screw leaves heat and resistance inside the splice, and a perfect outer seal will only hide that mistake until the fault shows up later.
Seal in the right order and protect the assembly
Once the conductors are joined, center the enclosure or tubing over the splice before you seal it. Heat-shrink kits need even heating across the full recovery area, not a quick pass that leaves cold spots. Resin kits need the two-part mix handled cleanly and given the full cure time before burial. Gel and silicone kits need the housing fully closed, with no debris or pinch points at the gasket.
Match the install method to the site. In a trench, mud and standing water make sloppy sealing harder to recover from. In a handhole, keep the splice positioned so it is not sitting in water if the layout allows that choice. If the splice shares space with adjacent outdoor gear, electrical enclosure selection for outdoor use matters because a bad enclosure choice can compromise the whole assembly.
Do not backfill a splice you have not inspected in your hands. If you cannot see the seal, you are trusting the trench instead of the work.
A short process video can help crews standardize the method before they start work on site.
Before the trench closes, do a continuity check, verify the seal is seated, and confirm the splice is not twisted or crushed by the backfill path. For shielded cable, also confirm the shield is handled the way the kit calls for, since a watertight shell does not fix a poor shield termination.
Where You Can Legally Place Splices and How to Test Them
A splice can pass an electrical check and still fail the job if it sits in the wrong location. That is the part retail product pages usually skip, and the part inspectors and utility specs focus on first.
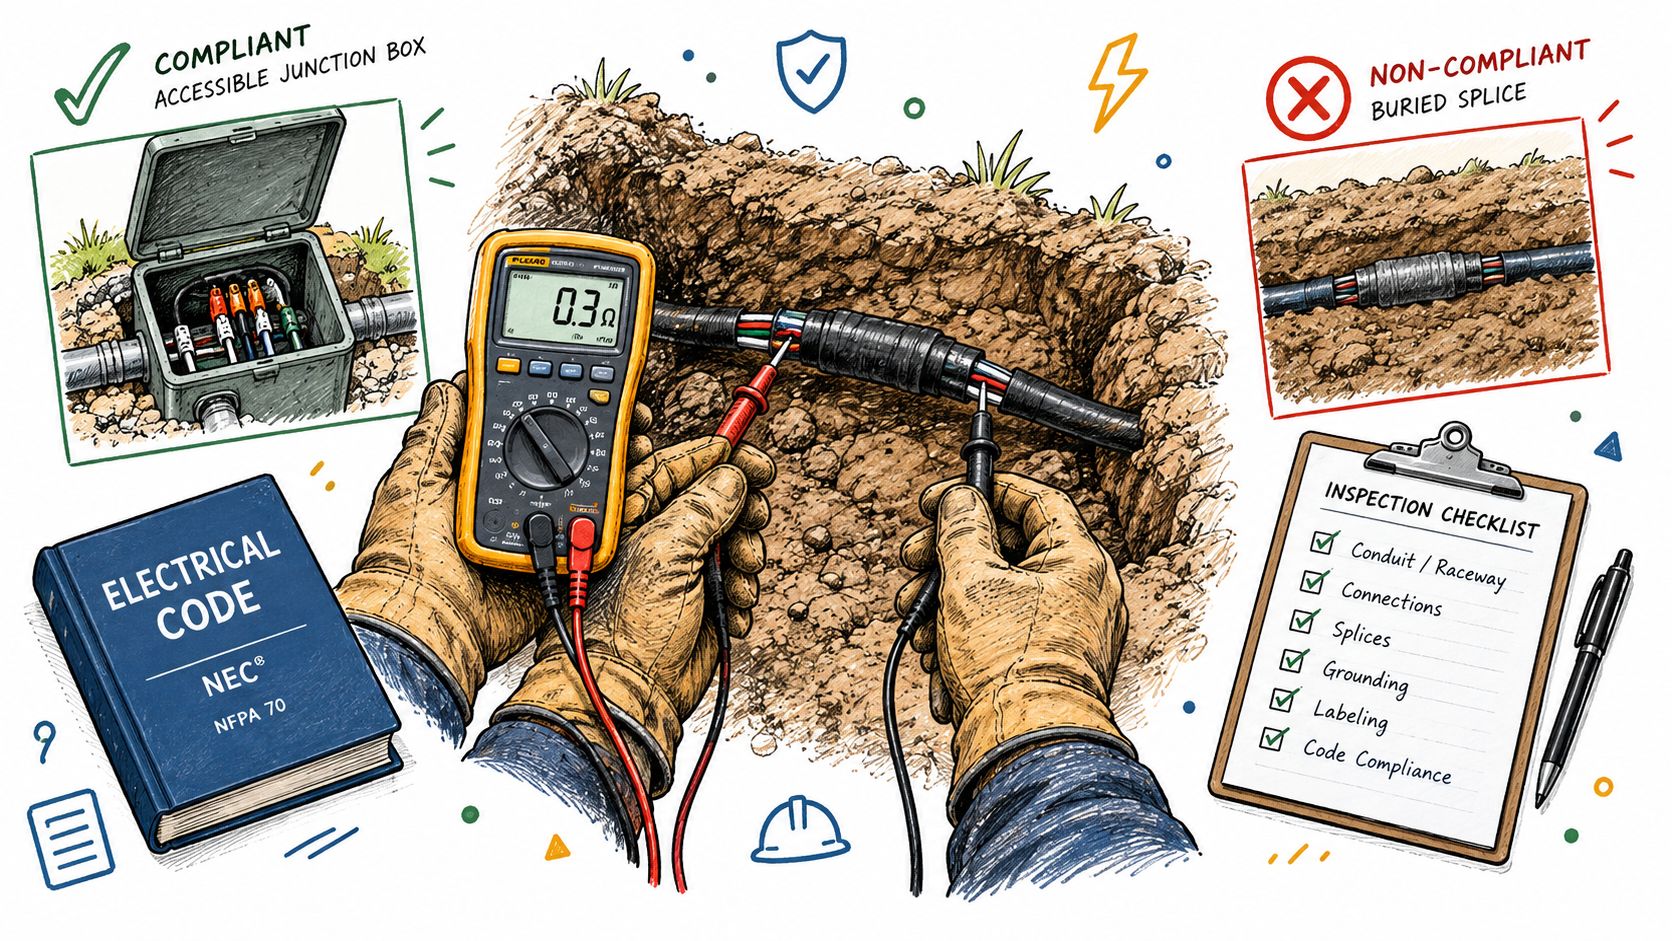
Retail claims are not the same as field approval
Many listings use direct-burial, watertight, or submersible language. Field specs are often tighter. Government and utility documents commonly push splice locations into accessible manholes, handholes, or pedestals, and some work also has to meet immersion requirements instead of simple wet-location exposure (DoD UFGS splice guidance).
That is why location comes first. A kit can be well made and still miss the spec if it cannot be reached for inspection or service. In utility work, access is part of compliance.
Test before the backfill makes the evidence disappear
Once the splice is complete, inspect the seal in hand, then test the circuit before burial. Use a low-resistance ohmmeter for continuity, then apply insulation resistance testing at 500V or 1000V if the manufacturer allows it. Catch the fault now, before soil and time hide it.
For shielded cable, confirm the shield is terminated the way the kit requires. A sealed housing does not fix a poor shield connection, and a good-looking splice can still fail electrically if the shield path is wrong.
Document the work before backfill. Record the kit type, conductor range, installation point, and the handhole or GPS reference so the splice can be found later without guesswork. If the job also depends on enclosure compatibility, electrical boxes and related hardware belongs in the same review, because the splice location and the enclosure choice affect each other.
If the splice cannot be inspected or retested later, the standard has to be tighter on day one.
Final Checklist for Reliable Underground Splices
A dependable underground splice comes from three filters, not one. First, pick the right kit technology for the environment. Second, match the kit to the conductor material, size, and cable type. Third, install it cleanly and test it before the trench disappears.
The bigger lesson is simple. Watertight on a retail page is not the same thing as compliant in the field. In weather-exposed or direct-burial work, the expectation is a sealed system that holds up under moisture, burial stress, and whatever the enclosure sees after the backfill goes in.
If the selection is unclear, or if the project needs alternate sourcing, compliance paperwork, or a substitute that matches the spec without slowing the job, that's the point to involve a distributor who works upstream of the box. ATEK Distribution helps contractors and procurement teams source electrical products, compare options, and keep mission-critical work moving when the specification is tight or the lead time is not.
If you're sourcing underground wire splice kits for a project, visit ATEK Distribution to compare electrical connectors, wire termination supplies, and related enclosure options in one place. If you need help matching conductor type, burial rating, or compliance documentation, their team can support the procurement side while you keep the install moving.